Braun ear thermometers are renowned for accurate‚ safe‚ and fast temperature measurements. Designed to prevent deep insertion‚ they protect the eardrum. Pediatrician-recommended‚ their precise results offer reliable health insights‚ vital for guiding proper care for all ages‚ from infants to adults.
Intended Use and Safety Precautions
Braun ThermoScan ear thermometers are carefully developed for intermittent human body temperature measurement. They are primarily intended for home users‚ suitable for patients ranging from normal weight newborns to geriatric adults. These devices are ideal for consumer use in a domestic environment‚ providing reliable temperature readings via the ear. While some Braun models are for professional use‚ the general series caters to personal and family health monitoring. For instance‚ the ThermoScan 7 features a flexible tip‚ ensuring comfortable and gentle use‚ even for infants‚ showcasing their versatile application across diverse age groups for crucial health assessments and monitoring needs.
Ensuring safety is paramount when operating these thermometers. The unique probe design prevents excessive insertion into the ear canal‚ safeguarding the delicate eardrum from harm. It is crucial to always keep the thermometer securely out of reach of children under 12 years to prevent accidental misuse or incidents; Users must diligently adhere to all general safety precautions and guidelines explicitly detailed in the accompanying instructions. Following these directives ensures both accurate readings and safe operation‚ contributing significantly to effective health management within the home environment for everyone.
Overview of Braun ThermoScan Models
Braun offers a diverse range of ThermoScan ear thermometers‚ each designed for precise and rapid temperature measurements. Models like the Braun ThermoScan 4 are specifically crafted for home-use environments‚ catering to consumers needing reliable intermittent body temperature checks. Advancing in functionality‚ the Braun ThermoScan 7 stands out with its remote sensing capabilities and suitability for newborns‚ featuring a flexible tip that ensures maximum comfort during use. This particular model also incorporates a convenient memory function‚ allowing users to store up to nine previous temperature entries‚ which is invaluable for tracking health trends over time. For more specialized applications‚ the Braun ThermoScan PRO 6000 is available‚ distinguished for its professional use environment indication‚ extending its utility beyond basic home care to clinical settings. Many Braun thermometers‚ including models like the IRT6525‚ integrate advanced features such as ExacTemp technology‚ which confirms proper positioning for accurate readings‚ and Age-Adjusted Fever Guidance‚ providing personalized interpretations based on the user’s age. This comprehensive lineup ensures there’s a Braun ThermoScan model to meet various user needs‚ from simple home monitoring to professional clinical applications‚ all while upholding a commitment to accuracy and user-friendliness across the brand.
Key Features and Design
Braun thermometers feature ergonomic handles‚ soft‚ flexible probe tips for comfort. Essential components: probe‚ clear LCD display‚ and control buttons. Automatic shut-off and disposable probe covers ensure hygienic‚ accurate temperature monitoring.
Essential Components and Display
The core of a Braun ear thermometer comprises several essential components designed for precision and user-friendliness. Primarily‚ it features a carefully shaped probe‚ engineered to prevent excessive insertion into the ear canal‚ thus safeguarding the eardrum during temperature measurement. This probe is crucial for capturing accurate readings directly from the ear. Complementing the probe is an intuitive LCD display‚ which presents clear and easy-to-read temperature results. This display often includes backlighting for visibility in various lighting conditions and may incorporate a fever indicator‚ providing visual alerts for elevated temperatures. Control buttons facilitate device operation‚ allowing users to power on/off‚ adjust settings‚ and initiate measurements. Other vital components include the battery door‚ ensuring power supply‚ and a protective case for storage and transport. Furthermore‚ disposable probe covers are integral for maintaining hygiene and preventing cross-contamination‚ automatically signaling readiness for use when attached. Models like the ThermoScan 7 may also feature a memory function‚ accessible via the display‚ to store multiple temperature entries. The seamless integration of these elements ensures accurate and efficient temperature assessment.
Ergonomics and Safety Enhancements

Braun ear thermometers are meticulously designed with a strong emphasis on user ergonomics and comprehensive safety features. Their ergonomic handles provide a secure and comfortable grip‚ facilitating steady handling during temperature measurements. A significant safety enhancement is the soft‚ flexible probe tip‚ which ensures gentle and comfortable insertion into the ear canal‚ making it suitable even for sensitive ears and newborns. The unique shape of the probe itself is a critical safety mechanism‚ preventing it from being inserted too deeply‚ thereby safeguarding the eardrum from potential harm. To uphold the highest hygiene standards and prevent cross-contamination‚ disposable probe covers are included‚ forming a protective barrier for each use. Furthermore‚ these thermometers incorporate an automatic shut-off function‚ conserving battery life and adding to the device’s overall safety profile by preventing accidental prolonged operation. The clear‚ often backlit‚ LCD display is designed for easy readability and includes a fever indicator‚ offering immediate visual alerts for elevated temperatures. These combined ergonomic and safety features ensure accurate‚ comfortable‚ and secure temperature monitoring for users of all ages.

Preparation Before Use
For accurate and safe measurements‚ proper preparation of your Braun ear thermometer is essential. This crucial stage ensures the device is ready and conditions are optimal. Always follow instructions for hygiene and optimal performance before any use.
Powering On the Device
To begin using your Braun ear thermometer‚ the first step is to power on the device correctly. Locate the designated power button‚ which is typically situated on the handle or side of the thermometer. A single press usually activates the unit. For some models‚ like the Braun ThermoScan 6525‚ the thermometer may automatically power on when a new probe cover is securely attached‚ signaling readiness with an audible beep.
Upon activation‚ listen for an audible confirmation‚ such as one or two beeps‚ and observe the display for a non-flashing ear icon or a light indicator‚ signifying that the device is powered on and prepared for measurement. If the thermometer fails to turn on‚ first verify that the batteries are correctly installed and have sufficient charge. Sometimes‚ holding the power button for a few seconds can initiate the device. It is also crucial to ensure the correct temperature scale (Celsius or Fahrenheit) is selected‚ adjusting the mode if necessary using the dedicated button‚ before proceeding to take a measurement for accurate readings and user convenience.

Ensuring Ear Canal Cleanliness
Before proceeding with any temperature measurement using your Braun ear thermometer‚ it is paramount to ensure the ear canal is clean and free from any obstructions. This crucial step directly impacts the accuracy of the readings and safeguards against discomfort during use. Accumulated earwax or debris can create a barrier‚ preventing the thermometer’s probe from accurately sensing the core body temperature‚ leading to potentially misleading results. Therefore‚ proper preparation is key to obtaining reliable insights into a person’s health status.
To prepare the ear canal‚ gently pull the outer ear. For adults and children over one year old‚ this typically involves pulling the ear backward and slightly upward to straighten the auditory canal. For infants under one year‚ a gentle pull on the earlobe downward is usually recommended; This manipulation helps to create a clearer path for the probe. It is vital to avoid inserting the probe forcefully‚ as this can cause discomfort or even injury to the eardrum. If there appears to be excessive earwax or visible dirt‚ gently clean the outer ear with a soft‚ damp cloth‚ but never insert anything into the ear canal itself. Finally‚ always use a new‚ disposable probe cover for each measurement to maintain hygiene and prevent cross-contamination‚ further ensuring both accuracy and safety.
Taking an Accurate Measurement
For precise temperature readings‚ carefully follow the instructions for your Braun ear thermometer. Correct probe positioning and proper measurement initiation are vital for obtaining reliable results. This ensures accurate insights into health‚ aiding in effective monitoring and informed decisions.
Correct Probe Positioning
Achieving accurate temperature readings with your Braun ear thermometer hinges critically on correct probe positioning within the ear canal. To begin‚ gently pull the outer ear. For adults and children over one year old‚ pull the outer ear backward and upward to straighten the ear canal. Conversely‚ for infants under one year‚ gently pull the ear lobe down to create a clear path. Once the ear canal is appropriately straightened‚ fit the thermometer’s probe snugly but comfortably into the canal. It is crucial to ensure a proper seal‚ as this prevents external air from interfering with the measurement‚ thereby guaranteeing precise and reliable results. Aim the probe straight towards the opposite ear or temple‚ as this alignment helps the sensor capture the core body temperature accurately. Avoid forcing the probe into the ear‚ as this can cause discomfort‚ potential injury‚ and lead to inaccurate readings. A gentle yet firm placement is essential. Always hold the thermometer steady throughout this process to maintain the correct angle and depth. Proper positioning is not merely a recommendation; it is a fundamental step to ensure the integrity and reliability of every temperature measurement taken with your Braun device.
Initiating and Completing the Measurement
To initiate a measurement‚ ensure your Braun thermometer is ready‚ indicated by two beeps and a non-flashing ear icon on the display. Once the probe is snugly positioned in the ear canal‚ press the start button firmly. It is crucial to maintain a steady hand and keep the probe absolutely still during the entire measurement process; any movement compromises accuracy. The device signals completion with an audible beep or a visual flash. After this signal‚ gently remove the thermometer from the ear canal. The precise temperature will then be clearly displayed on the LCD screen. For battery conservation‚ the Braun ThermoScan automatically powers off after 60 seconds of inactivity. Alternatively‚ manually turn it off by pressing and holding the start button for over five seconds. Always consult your specific user manual for precise button operations and timing‚ ensuring consistent and accurate results.

Interpreting Results
Understanding Braun ear thermometer readings is crucial for health monitoring. Reference normal temperature ranges to assess findings. High readings indicate potential fever‚ requiring careful consideration. For infants‚ consult a pediatrician. Accurate interpretation ensures proper care and decision-making for all ages.
Understanding Temperature Ranges
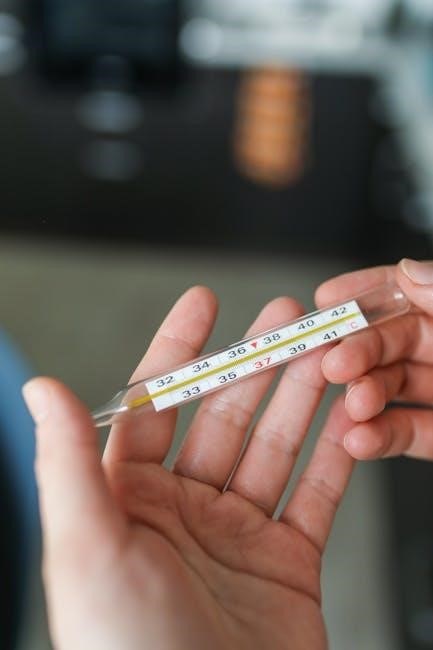
Interpreting readings from your Braun ear thermometer requires a clear understanding of normal‚ elevated‚ and feverish temperature ranges. A typical normal ear temperature generally falls within 35.4°C to 37.8°C (95.7°F to 100°F). It’s important to remember that individual normal temperatures can vary slightly‚ and a single reading should always be considered within the context of the patient’s usual baseline. Readings that exceed this normal range‚ particularly those above 38°C (100.4°F)‚ are often indicative of a fever. The digital display on Braun thermometers provides clear results‚ frequently enhanced with color-coded indicators‚ which offer a quick visual assessment of the temperature status. This feature aids users in rapidly distinguishing between normal and potentially concerning temperatures. However‚ it is crucial to recognize that fever thresholds are not universal and can vary significantly‚ especially for different age groups. For instance‚ what constitutes a fever in an adult might be interpreted differently in a young child or infant. Therefore‚ understanding these nuances is paramount for accurate interpretation and making informed decisions regarding health management. Always consider the patient’s age and overall symptoms in conjunction with the numerical reading for the most accurate assessment.
Fever Indications and Next Steps
If your Braun ear thermometer displays a reading above 38°C (100.4°F)‚ this clearly indicates the presence of a fever. For adults and older children‚ the initial steps involve monitoring symptoms closely and considering over-the-counter fever-reducing medication if discomfort is present‚ always adhering to dosage instructions. It is crucial to ensure adequate hydration by encouraging fluid intake and promoting rest to aid recovery. However‚ for infants‚ particularly those under three months of age‚ a fever is a serious concern requiring immediate medical attention. In such cases‚ always seek professional medical advice promptly‚ consulting a pediatrician without delay. For all age groups‚ if the fever persists or is accompanied by severe symptoms‚ or if there is any uncertainty‚ consulting a healthcare provider is highly recommended. Accurate readings from your Braun thermometer are instrumental in guiding appropriate care decisions‚ helping to prevent potential complications‚ and ensuring timely intervention. This precise information empowers users to take the most suitable next steps for their health or that of their loved ones.
Maintenance and Troubleshooting
Maintaining your Braun ear thermometer and resolving common issues ensures continued accuracy. Regular cleaning‚ proper storage‚ and consulting the user manual for troubleshooting guidance are crucial for optimal performance and reliable temperature measurements.
Cleaning and Proper Storage
Maintaining your Braun ear thermometer’s accuracy and hygiene requires careful cleaning and proper storage. Regularly wipe the exterior with a soft‚ dry cloth. For the probe‚ gently dampen a cloth with a mild soap solution‚ meticulously wiping the tip while ensuring no moisture enters the device. Never submerge the thermometer in water. After cleaning‚ allow the probe to air dry completely before storage to prevent contamination and ensure reliable readings. Always follow the manufacturer’s guidelines for optimal performance.
Store your Braun ear thermometer in a cool‚ dry place‚ away from direct sunlight and moisture. Use its original protective case or a sturdy pouch to prevent damage. Ensure the device is clean and dry before storing. If storing for an extended period‚ remove batteries to prevent leakage‚ thus maintaining accuracy and extending its lifespan. Unused probe covers should also be stored in a clean‚ dry environment‚ ready for future hygienic use. Adhering to these storage conditions‚ as per manufacturer’s instructions‚ guarantees sustained functionality and preserves the product’s quality and longevity‚ making it ready whenever needed for precise temperature monitoring.
Resolving Common Issues and Errors
Troubleshooting your Braun ear thermometer effectively ensures continued accuracy and functionality. If you encounter inconsistent readings or device malfunctions‚ begin by consulting your user manual or contacting Braun customer support for expert guidance and resolution. Proper usage is paramount to prevent many common issues.
When your thermometer displays specific error messages‚ targeted actions are required. For instance‚ if you see an “ERR1” or “BAT” message‚ promptly check the battery compartment for proper installation and replace low batteries. A “PROBE” error typically indicates that the probe cover is either not securely attached or is damaged; ensure it’s fitted correctly and undamaged. If these basic checks don’t resolve the issue‚ try turning the device off and on again to reset it. Always refer to your user manual for specific error code interpretations and their recommended solutions.
For persistent inaccurate readings‚ verify that the probe is correctly positioned snugly in the ear canal‚ aiming towards the opposite temple. Remove any earwax or debris that might obstruct the sensor. Crucially‚ always use a new‚ securely attached probe cover for each measurement to prevent contamination and ensure optimal sensor performance. If inaccuracies persist‚ consider checking the device’s calibration or performing a factory reset if available. Environmental factors like strong drafts or improper storage can also impact accuracy. Adhering strictly to manufacturer guidelines will help maintain optimal performance.

Advanced Thermometer Functions
Braun ear thermometers incorporate sophisticated functions designed to significantly enhance user experience‚ accuracy‚ and convenience for comprehensive health monitoring. These advanced capabilities go beyond basic temperature measurement‚ offering intelligent features that provide more meaningful insights into a person’s health.
A prime example is the age-adjusted fever guidance. This innovative feature provides personalized recommendations and interpretations based on the user’s specific age (infant‚ child‚ or adult). It automatically adapts its guidance‚ reducing confusion for parents and caregivers‚ and ensuring appropriate actions. This tailored advice helps understand fever severity accurately‚ enhancing user confidence in managing health and ensuring proper care tailored to individual needs.
Furthermore‚ the memory recall function is an invaluable tool. It allows users to effortlessly store and review previous temperature readings‚ often up to 10 entries. This historical data is crucial for tracking fever progression over time‚ identifying trends‚ and observing treatment effectiveness. Parents and caregivers can easily access this past information‚ simplifying health management and facilitating more informed discussions with healthcare professionals during consultations‚ ultimately leading to better health outcomes.